|
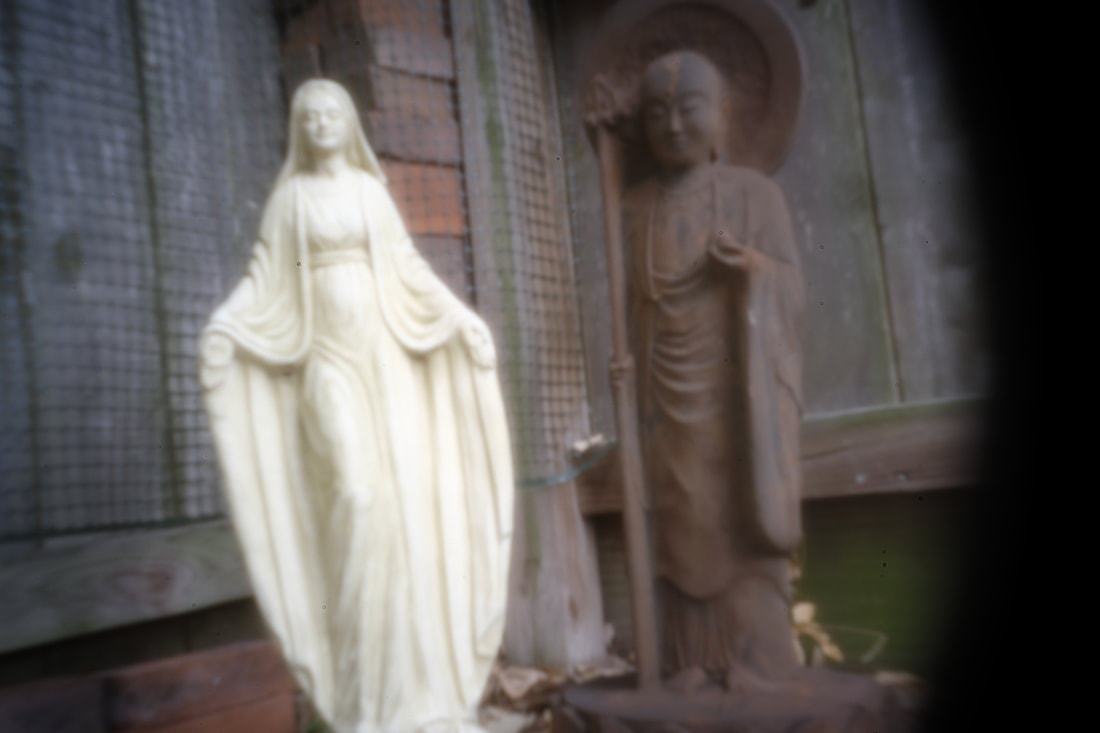
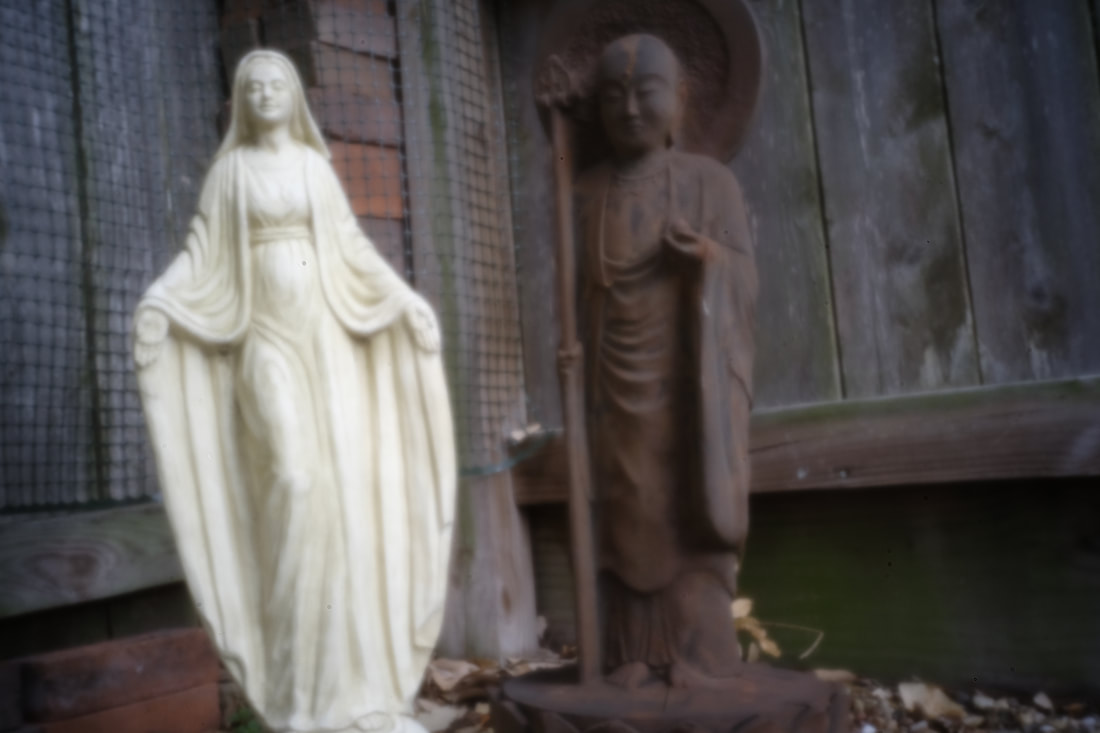
In my last post, I was talking about the Pinhole Pro and my efforts to find proper exposures when using it. So this time I'm going to review the actual images. I decided to begin with the smallest aperture (0.10) to see what kind of image was possible having to use a longer exposure. The first image I took had something blocking the view, but I couldn't find anything in the way of the pinhole that would cause it. At first, I thought it might be the UV filter attached to the front, but then realized it was the engagement ring being out of alignment. You have to be careful to engage the ring exactly right or you will block some of the image. Notice the left image has a black shadow on the right side. This is not an exposure issue, but rather it is part of the edges of the pinhole blocking the field of view. After readjustment, you can see there is nothing blocking the scene in the right image.
This was not a major issue... it just means I have to be careful to engage the aperture ring properly. The images themselves are fairly sharp for something that has no lens elements. The statuary is close to the camera and everything seems to retain the same amount of sharpness throughout, which is expected with a pinhole. The exposure is slightly different, but that was most probably the outside light changing from one exposure to the next. Since the apertures for both images remained the same, there should be no exposure difference otherwise. Color balance is, as far as I can tell, spot on, which I was not expecting. I thought there might be a shift due to diffraction from the small aperture. The image was taken in a shady area on a sunny day, so an exposure at I.S.O. 200 at 1/250 of a second would need an f/stop of f/8 using a lens. The 0.10 aperture is about f/512, which means I need a +12 stop exposure compensation. This meant my exposure time was 16 seconds. Interestingly enough, I didn't seem to have an issue with reciprocity failure, which I was also expecting. Not sure if that has anything to do with digital vs. film or not, but the exposure time didn't have to be adjusted, which was fine with me! My next set of images shows a scene with a wider view using each aperture and their resulting effects. These images should expand when you click on them, so you can look at them in greater detail.
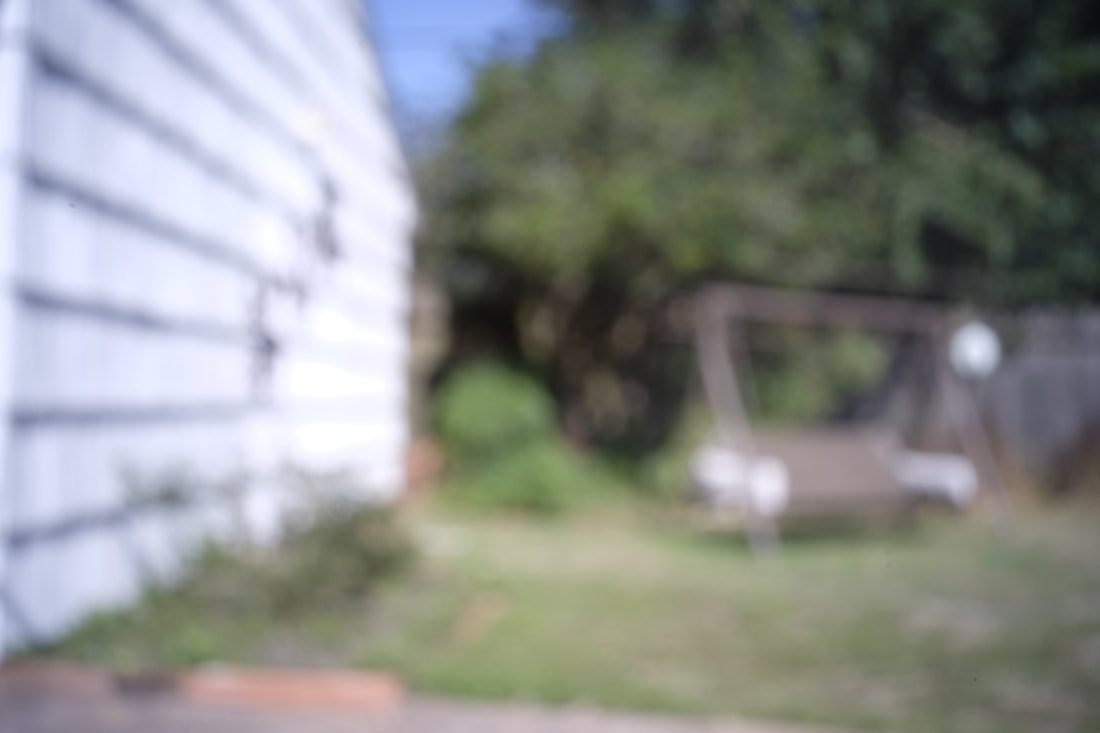
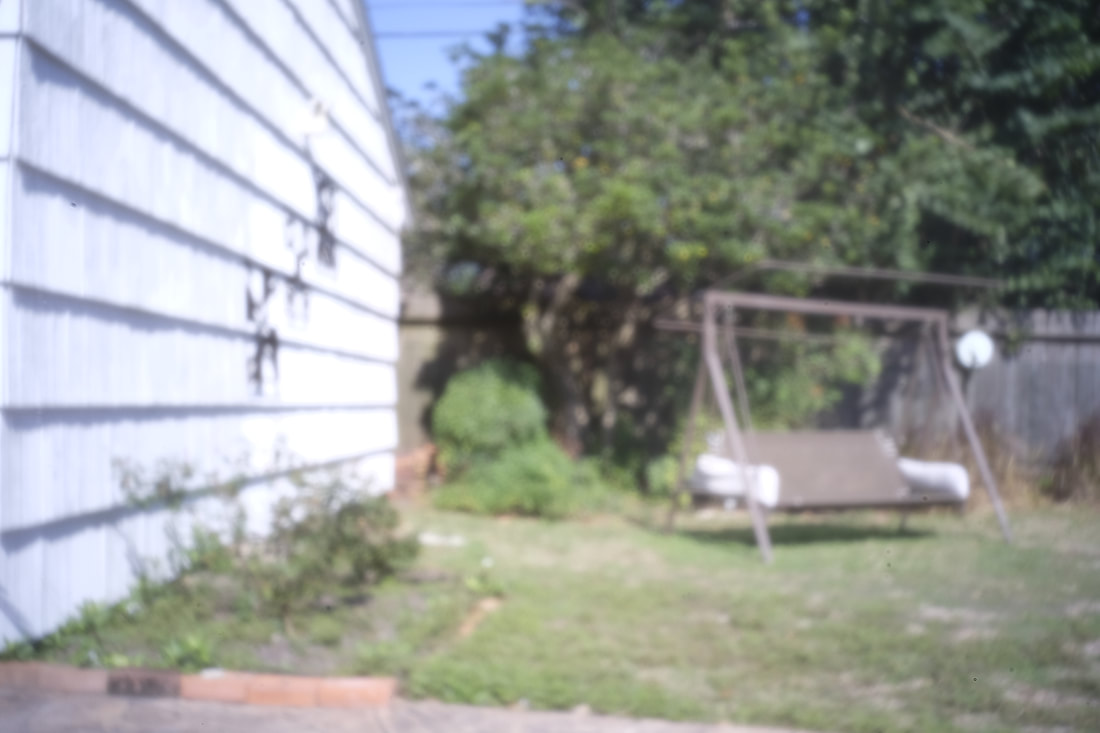
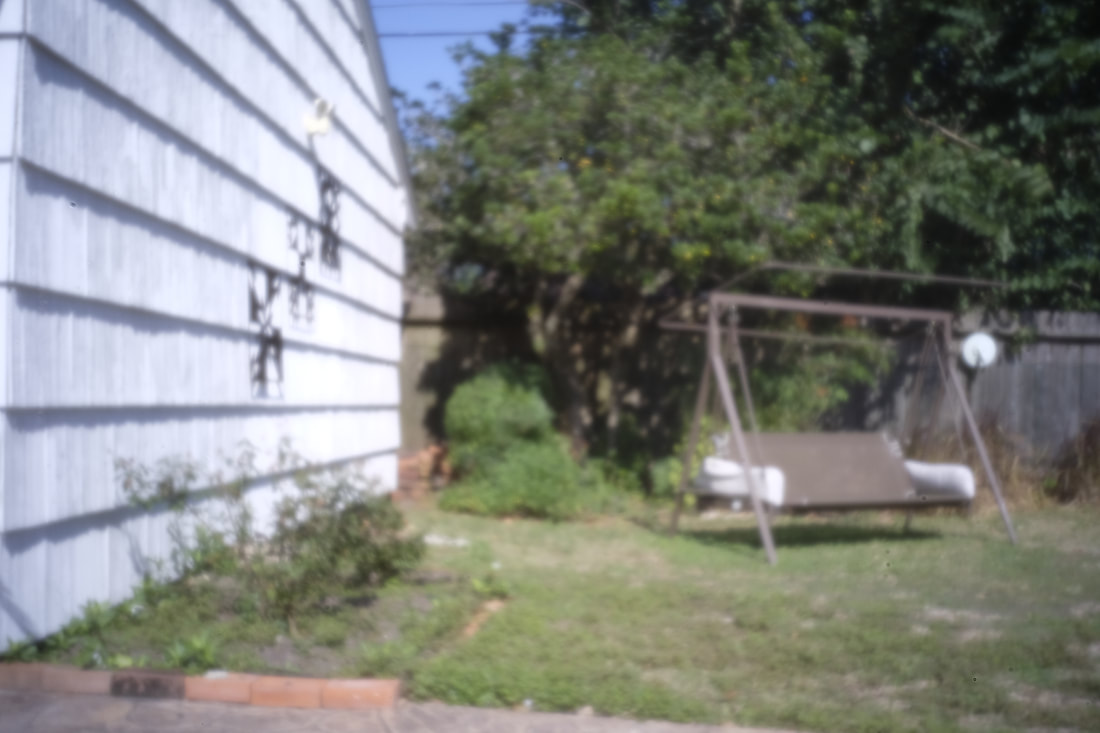
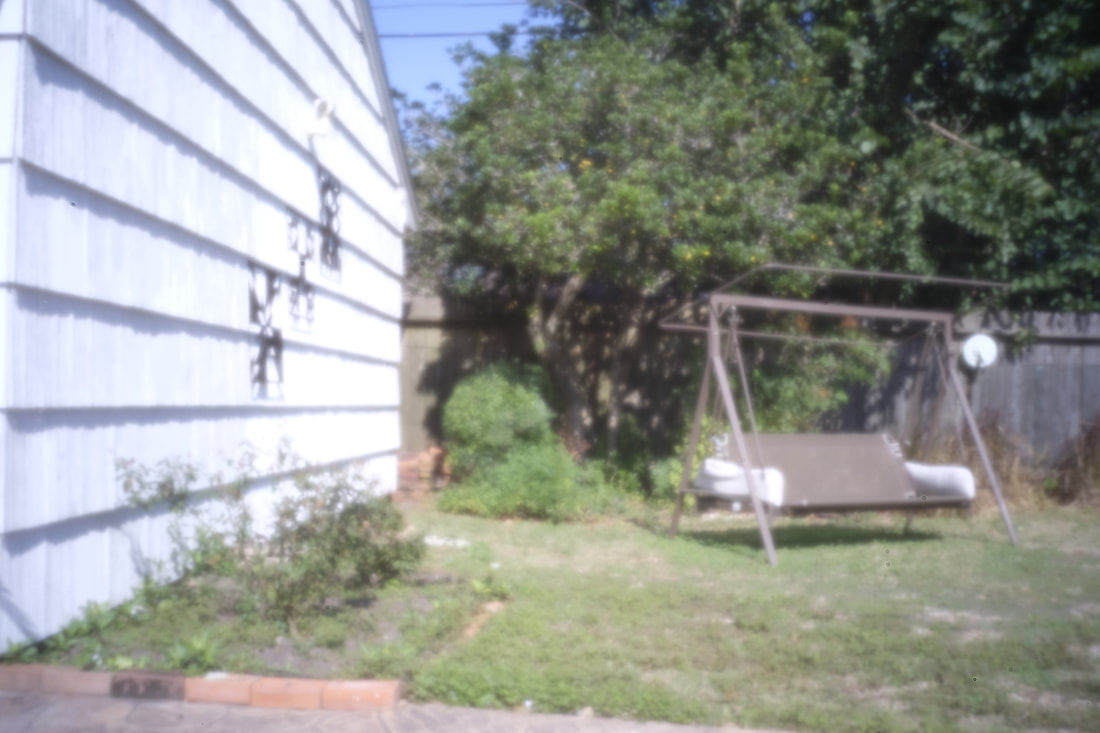
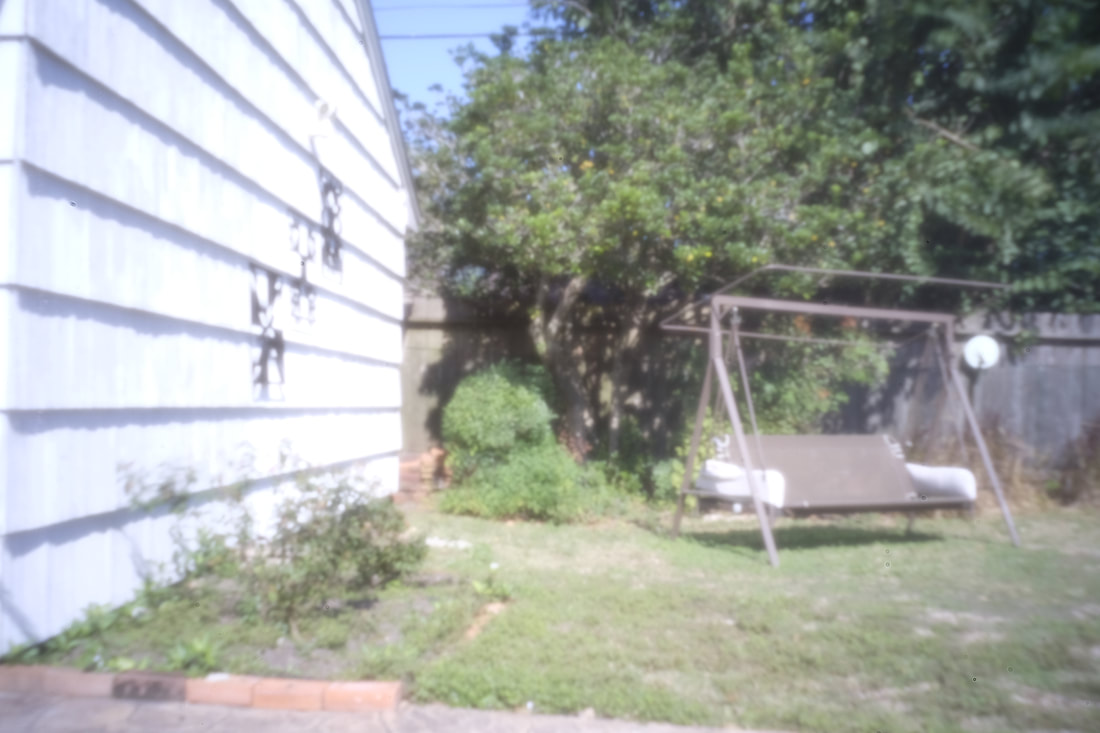
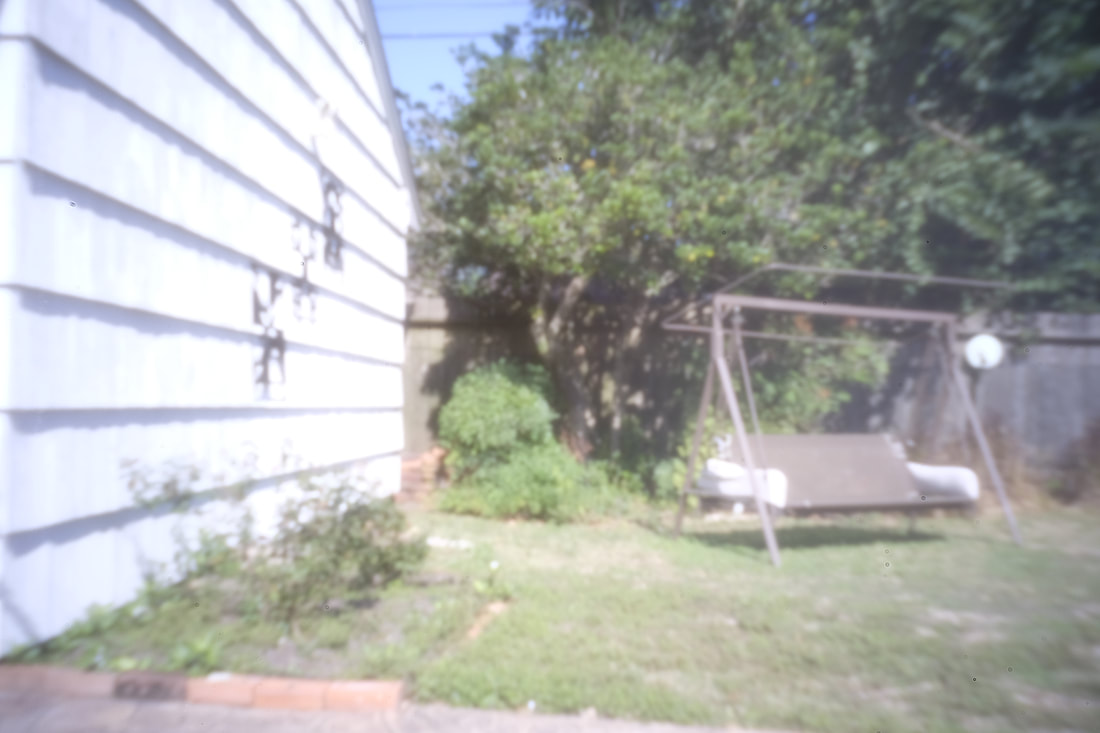
The image is the side of a garage with an outdoor patio swing in a yard. Very exciting... not. But it serves its purpose. I wanted to use a wider view to see if there was any apparent change in sharpness near to far. The day was bright and sunny, so an exposure at I.S.O 200 at 1/250 of a second would need f/16 for a proper exposure. This meant the 0.80 aperture would need 4 stops of extra exposure, or 1/15 of a second. Each image needs twice more exposure than the last (except the 0.25 pinhole, which remains the same as the 0.30 aperture - see The Pinhole Pro post for a short explanation). The longest exposure was 4 seconds while using the 0.10 pinhole.
Each image retains the same relative sharpness throughout the scene, and again, this is expected when using pinholes instead of a lens. Another thing to note is the obvious change in sharpness as you go from the largest 0.80 aperture and decrease the size. Again, this would be expected as a larger aperture would result in shorter exposure times but less sharpness throughout. Keep in mind everything here is judged by a visual inspection of the images on a computer screen and I was using my camera equipment, not yours, so your results may differ. Understand also that "sharpness" is a relative term, and images of greater contrast are often seen as "sharper" than low contrast ones, so again... your mileage may vary! The 0.30 aperture is slightly lighter than the 0.80, 0.50, and 0.35 images, but remember that I round off exposure times to make things simple when I am out in the field. It is possible I overexposed by 1/3 stop or so, or it could have been the outdoor light of the scene changed for that exposure. The 0.20, 0.15, and 0.10 images are progressively lighter, but I am inclined to think that could have been a change of lighting in the scene and rounding off the exposure times. Just a guess, but I'm going with it. It was interesting to see how much sharper images got as I decreased the pinhole size, but you will note that the 0.10 image is actually slightly less sharp that the 0.15 pinhole image. This could very well be a result of diffraction from such a small aperture. There does seem to be some flare in the image, which would reduce contrast and relative sharpness. I am thinking of creating images of a close up scene using just the smaller apertures to see what results. I would assume I should get similar results, but you never know. Overall, I am very pleased with the Pinhole Pro. It's nice to use some old school technology on a new millennium instrument. If anyone else has purchased a Pinhole Pro, or has created a pinhole for their digital camera, I'd love to hear from you and get your input. If I find any more interesting observations, I'll let you know.
0 Comments
Leave a Reply. |
fotostufphotographic illuminations Archives
December 2018
Categories
All
|


 RSS Feed
